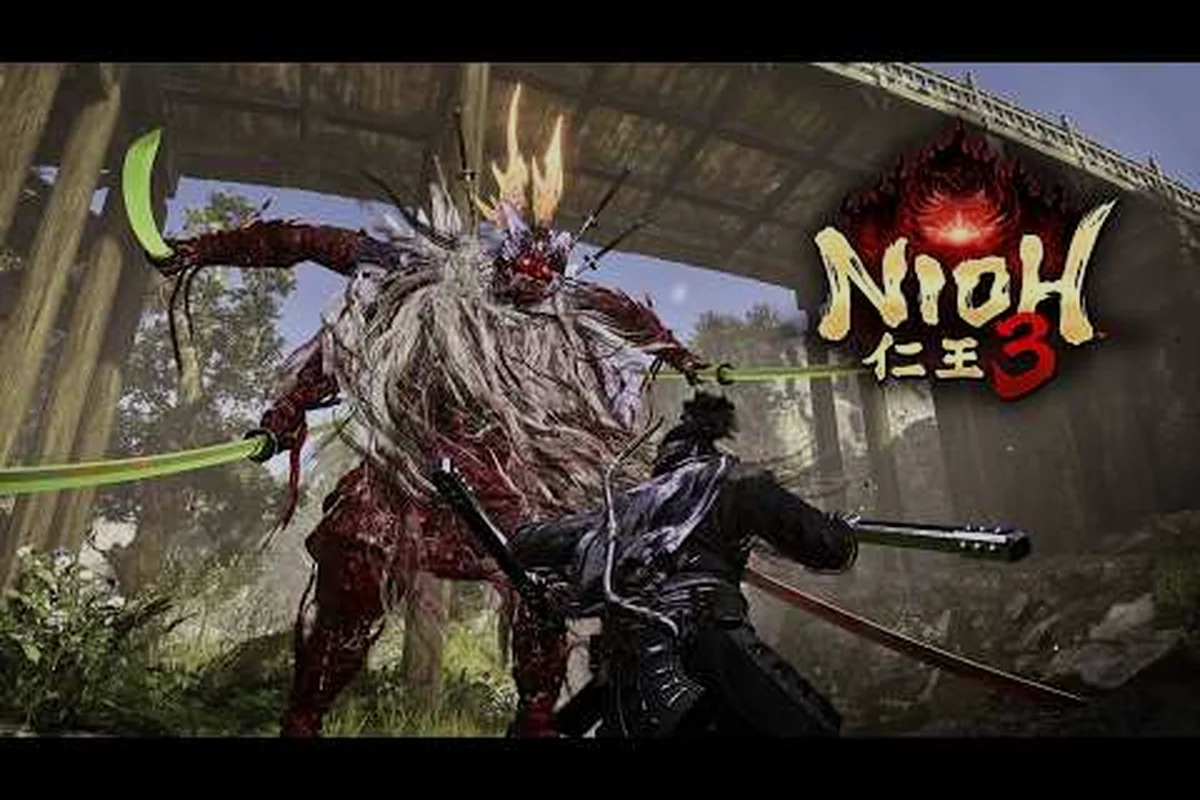
The Nioh 3 Bloodedge Demon is the most punishing optional encounter in Team Ninja's latest Soulslike, and it appears only after you've slaughtered enough Revenants to attract its Malice. This guide breaks down every attack pattern, the exact elemental weaknesses, and the burst counter windows you need to exploit if you want to claim the Demon of Pride soul core and the exclusive loot it drops. Because this boss scales with your level and can spawn in any era, you need a flexible strategy rather than a single cheese tactic.
What makes the Nioh 3 Bloodedge Demon fight so brutal is that it combines the speed of a human boss with the hyper-armor of a Yokai, creating a hybrid that punishes both aggressive and passive playstyles. The fight demands that you understand burst counter timing, ki pulse discipline, and elemental status application simultaneously. If you walk in without a plan, you will burn through your elixirs in under a minute, which is why the community consistently ranks this as one of the hardest fights in the entire game alongside the Blood Spurting Ogin encounter.
Bloodedge Demon Spawn Conditions and Arena
The Bloodedge Demon does not appear on your first playthrough by accident; you must actively trigger its arrival by engaging with the Revenant system. According to community reports and the IGN wiki's early-game priorities, the demon spawns after you've repeatedly killed Revenants and followed the trail of their Malice across multiple missions. The game will show an on-screen popup when the demon has manifested in your world, and killing another Revenant afterward will point you in the direction of its current location.
The arena itself is a corrupted version of whatever map you happen to be in when the spawn triggers, which means the terrain can vary wildly between encounters. You might fight on a narrow bridge in the first region or in an open field in the third, so you cannot rely on memorizing a single layout. What stays consistent is the purple-black fog that surrounds the arena edges, which drains your Anima gauge slowly if you stand in it for more than a few seconds. This environmental pressure forces you to stay in the demon's face rather than kiting it around the map.
Because the Bloodedge Demon can spawn in any era, its base stats scale with your current level, but the scaling is not linear. Community testing suggests that the boss gains roughly 8% more health and 5% more damage for every ten player levels above 50, which means fighting it at level 120 is significantly harder than fighting it at level 80. This is why the PowerPyx boss guide recommends waiting until you have a fully upgraded weapon and at least 40 points in your primary damage stat before attempting the encounter.
How to Track the Demon's Location
Once the spawn popup appears, you need to open your map and look for a glowing red skull icon that pulses every few seconds. This icon marks the demon's current territory, and it will move to a new location every time you die or leave the mission. The tracking mechanic is intentionally vague, so you should prioritize missions with short boss runs if you want to minimize the time spent searching. Players have reported that the demon tends to spawn near large bodies of water or in areas with high Revenant density, so checking those zones first can save you a significant amount of time.
Core Attack Patterns and How to Read Them
The Nioh 3 Bloodedge Demon has a moveset that borrows heavily from both the Green Shadow Blade humanoid enemies and the larger Yokai bosses, creating a blend that requires you to recognize visual tells rather than audio cues. The demon's most dangerous attack is a five-hit combo that starts with a horizontal slash, followed by two quick thrusts, a spinning overhead slam, and a final wide sweep that covers almost the entire arena. Each hit in this combo has a different timing, so mashing dodge will get you caught by the later swings.
The boss also has a grab attack that it telegraphs by crouching low and extending both arms forward with purple energy crackling at the fingertips. This grab has a surprisingly long range and can pull you in from about two character lengths away, so you need to recognize the crouch animation immediately and sidestep rather than backpedal. If the grab connects, it deals massive damage and applies a Curse status effect that reduces your attack power by 30% for fifteen seconds.
Burst Counter Opportunities
The most important mechanic in this fight is the burst counter, which you can trigger when the demon flashes red during specific attacks. The demon has three distinct burst counter windows, each tied to a different attack in its moveset. The first window occurs during the spinning overhead slam at the end of its five-hit combo, where the demon pauses for a split second before the slam connects. The second window happens during a lunging thrust that the demon only uses when you are at mid-range, and the third window is tied to a ground slam that creates a shockwave.
| Burst Window | Trigger Attack | Timing Window | Recommended Counter |
|---|---|---|---|
| Window 1 | End of five-hit combo | 0.4 seconds after flash | Brute counter for interrupt |
| Window 2 | Mid-range lunging thrust | 0.2 seconds after flash | Feral counter for dodge-through |
| Window 3 | Ground slam shockwave | 0.6 seconds after flash | Phantom counter for range |
If you successfully land a burst counter, the demon will be staggered for about two seconds, which gives you enough time to apply a Confusion status effect if you have two elemental weapons equipped. The stagger also resets the demon's ki regeneration, meaning you can start a full combo chain without worrying about the boss recovering its stamina mid-string.
Elemental Weaknesses and Damage Strategy
The Bloodedge Demon is weakest to Water and Lightning damage, with a notable resistance to Fire and a complete immunity to Poison. According to the Rock Paper Shotgun weapons tier list, the best approach is to bring a Water-infused primary weapon and a Lightning secondary weapon so you can apply both status effects in quick succession. When both statuses are active simultaneously, the demon suffers the Confusion debuff, which increases all damage taken by 40% and prevents it from using hyper-armor attacks.
The demon's ki bar is also a critical target, because depleting it triggers a final blow state that lasts for four seconds. You can drain the ki bar faster by using yokai abilities that deal high ki damage, such as the Ippon-Datara hammer slam or the Enki spear thrust. However, you need to be careful because the demon's ki recovery is extremely fast when it is below 30% health, so you should save your strongest ki-damage abilities for the final phase of the fight.
Recommended Equipment Loadout
| Equipment Slot | Recommended Option | Why It Works |
|---|---|---|
| Primary Weapon | Water-infused Odachi | High ki damage, wide swings hit the demon's large hitbox |
| Secondary Weapon | Lightning-infused Dual Swords | Fast attack speed applies Lightning status quickly |
| Ranged Weapon | Rifle with Water Ammo | Applies Water status from range before engaging |
| Guardian Spirit | Kasha (Fire) or Paired Raiken (Lightning) | Provides elemental damage on yokai shift activation |
| Accessory | Yasakani Magatama | Reduces set bonus requirements, allows more elemental flexibility |
You should also equip the Carnage Talisman and Steel Talisman from the Onmyo tree, because the former boosts your attack by 20% while the latter reduces incoming physical damage by 15%. These two buffs stack with the Confusion debuff to create a massive damage window, but you need to reapply them every thirty seconds because they have a short duration. If you are struggling with the fight, consider using the Sloth Talisman to slow the demon's attack animations, although this makes the fight take longer and is generally considered a crutch by the community.
Phase Transitions and Enrage Mechanics
The Bloodedge Demon has three distinct phases, each triggered by a health threshold that changes its behavior and adds new attacks to its moveset. The first phase lasts from 100% to 70% health, and during this phase the demon relies primarily on its basic combos and the grab attack. The second phase begins at 70% health, where the demon gains a dark aura that increases its movement speed by 20% and adds a projectile wave to its ground slam attack. The third phase starts at 30% health, and this is where the fight becomes truly chaotic.
During the final phase, the demon summons phantom copies of itself that attack alongside the real boss for about ten seconds. These copies deal reduced damage but can interrupt your combos, so you need to prioritize dodging over attacking when they appear. The demon also gains a health regeneration effect that restores about 1% of its max health per second, which means you cannot afford to play passively during this phase. This is where the Demon of Pride soul core becomes valuable, because using it as a yokai ability deals massive damage and staggers the demon out of its regeneration state.
Managing the Enrage Timer
The enrage mechanic in this fight is tied to the Malice meter that fills up whenever you take damage from the demon's grab attack or stand in the purple fog. When the Malice meter reaches 100%, the demon enters a permanent enrage state that increases its damage output by 50% and makes its attacks unblockable. You can reduce the Malice meter by using purification talismans or by landing successful burst counters, so you need to balance aggression with defensive play to avoid triggering the enrage state.
Players who have beaten the Blood Spurting Ogin boss report that the same ki pulse purification technique works well here, because it clears the Malice buildup while also restoring your ki. The key difference is that the Bloodedge Demon punishes you much harder for missing a burst counter, so you should practice the timing in the training dojo before attempting the real fight. If you can consistently land two out of three burst counters, you will keep the Malice meter under control and prevent the enrage state from activating.
Farming the Bloodedge Demon for Loot
The Bloodedge Demon is one of the best sources of high-value loot in the early game, according to the IGN early-game guide, which makes it worth farming even after you have beaten it once. The boss drops a guaranteed Divine-tier weapon on every kill, along with a chance to drop the Demon of Pride soul core and a rare Smithing Text that unlocks a unique armor set. The drop rates are not officially published, but community testing suggests the soul core drops at roughly a 15% rate and the Smithing Text at a 5% rate.
If you want to farm the boss efficiently, you should equip the Hunter's Blessing from the Kodama statues in the region where the demon spawned, because this increases the drop rate of rare materials by 10%. You should also bring the Itokuri guardian spirit, which increases item drop rates by 5% and luck by 50, stacking with the Hunter's Blessing for a significant boost. The fastest farming route involves killing the demon, collecting the loot, and then using a Himorogi Branch to leave the mission without completing it, which resets the spawn timer.
Comparing Bloodedge Demon to Other Secret Bosses
| Boss | Difficulty Rating | Best Element | Unique Drop | Recommended Level |
|---|---|---|---|---|
| Bloodedge Demon | 9/10 | Water + Lightning | Demon of Pride soul core | 80+ |
| Blood Spurting Ogin | 8/10 | Fire | Ogin's Blood Katana | 70+ |
| Green Shadow Blade | 7/10 | Lightning | Shadow Blade Art | 65+ |
The Bloodedge Demon is generally considered harder than the Blood Spurting Ogin because of its faster attack speed and the phantom copy mechanic in the final phase. However, the Green Shadow Blade is more punishing for players who rely on blocking, because its attacks have high ki damage that can break your guard in two hits. If you are looking for a progression path, you should tackle the Green Shadow Blade first, then the Blood Spurting Ogin, and save the Bloodedge Demon for last. This order lets you collect better gear and soul cores before facing the toughest challenge. Once you have cleared the Bloodedge Demon, you can test your refined build against the optional challenge of Yamagata Masakage, whose unique mechanics demand the exact kind of gear and soul core synergy you’ll have developed by following this order—see our Nioh 3 Yamagata Masakage guide for a full breakdown of his attack patterns and the best strategies to exploit them.
Frequently Asked Questions
How do I unlock the Nioh 3 Bloodedge Demon boss fight?
You need to kill multiple Revenants across different missions and follow the trail of their Malice. The game will show an on-screen popup when the demon spawns, and killing another Revenant afterward will point you toward its location. The boss can appear in any era and scales with your level.
What is the best element to use against the Bloodedge Demon?
Water and Lightning are the most effective elements because they trigger the Confusion debuff when both are applied simultaneously. This debuff increases damage taken by 40% and prevents the demon from using hyper-armor attacks. Fire deals reduced damage, and Poison is completely ineffective against this boss.
Can I farm the Bloodedge Demon for rare loot?
Yes, the boss drops a guaranteed Divine-tier weapon on every kill, plus a chance to drop the Demon of Pride soul core and a rare Smithing Text. Equip the Hunter's Blessing and the Itokuri guardian spirit to boost drop rates. Use a Himorogi Branch to reset the spawn after each kill.
How do I counter the demon's grab attack?
The grab attack is telegraphed by a crouch animation with purple energy at the fingertips. Sidestep rather than backpedal, because the grab has a long range. If you get caught, the Curse status effect reduces your attack power by 30% for fifteen seconds, so prioritize dodging this attack above all others.
What level should I be before fighting the Bloodedge Demon?
Community testing suggests you should be at least level 80 with a fully upgraded weapon and 40 points in your primary damage stat. The boss gains roughly 8% more health and 5% more damage for every ten player levels above 50, so fighting it too early is significantly harder.